Buying an aquarium test kit is a great first step.
Knowing how to use it correctly is what actually helps your fish.
Many beginners test their water, see a few numbers, and still feel confused about what those numbers mean or what they should do next.
The good news is that water testing isn’t nearly as complicated as it first appears.
Once you understand the basics, it becomes one of the easiest ways to keep your aquarium healthy and avoid common problems before they affect your fish.
In this guide, we’ll walk through the testing process, explain what the results mean, and highlight the mistakes beginners make most often.
Why Testing Aquarium Water Matters
Your aquarium may look perfectly healthy on the outside.
The water can be crystal clear.
The fish may appear active.
Yet water chemistry problems can still be developing beneath the surface.
Testing allows you to:
- Detect problems early
- Monitor the nitrogen cycle
- Prevent fish stress
- Make informed maintenance decisions
- Build confidence as a fishkeeper
Think of water testing as a routine health check for your aquarium.
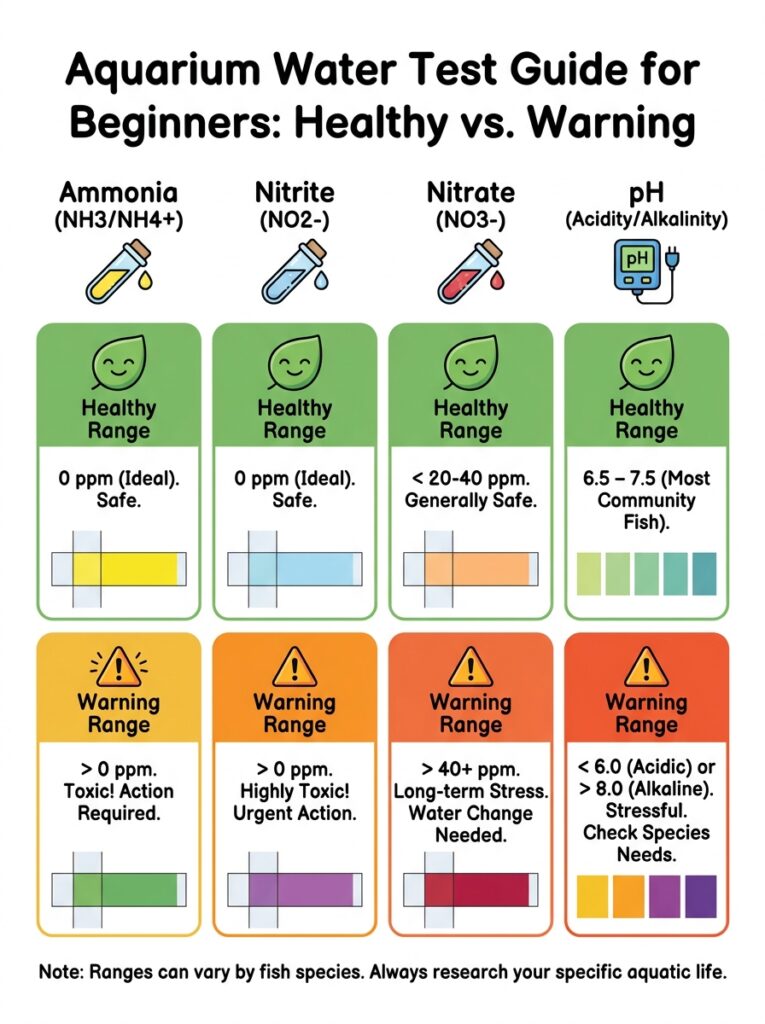
The Four Water Parameters Every Beginner Should Understand
For most beginners, these are the most important numbers.
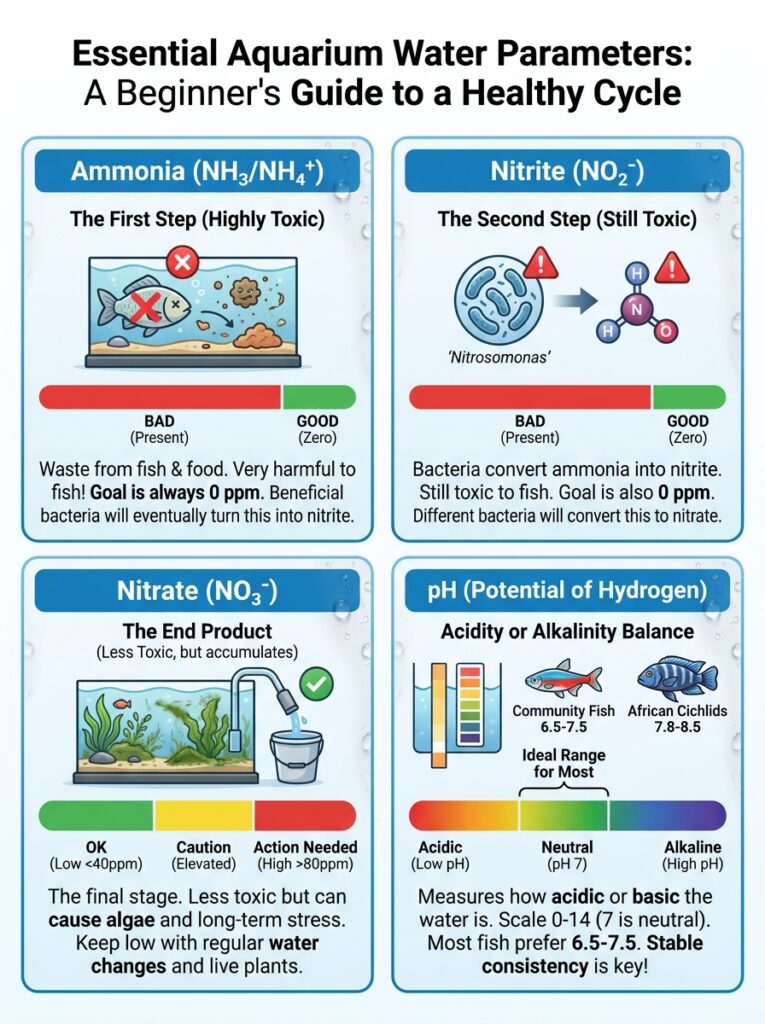
Ammonia
Should usually be zero in a healthy established aquarium.
Nitrite
Should also typically be zero.
Nitrate
Usually present in small amounts and managed through maintenance.
pH
Measures acidity or alkalinity and should remain stable.
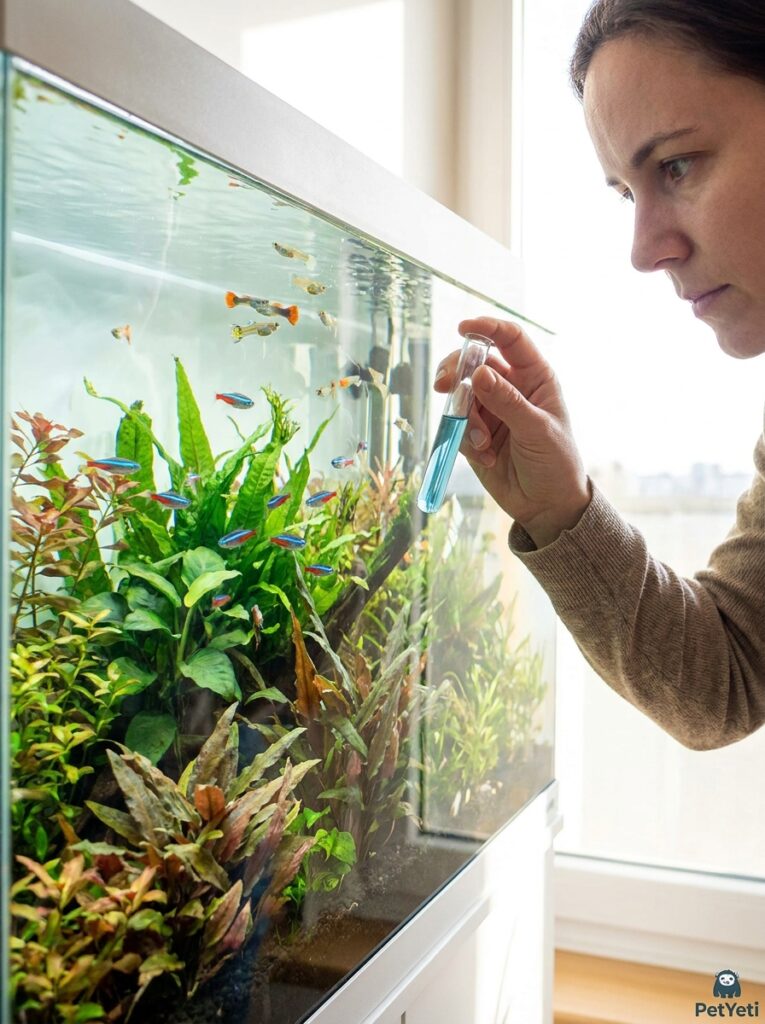
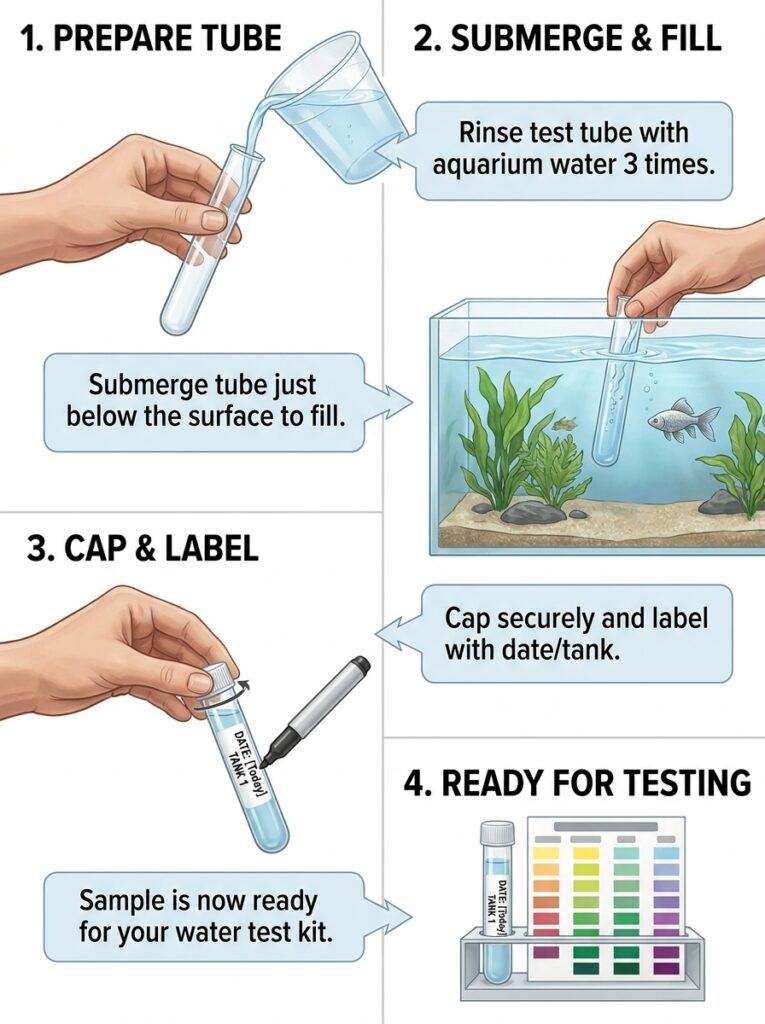
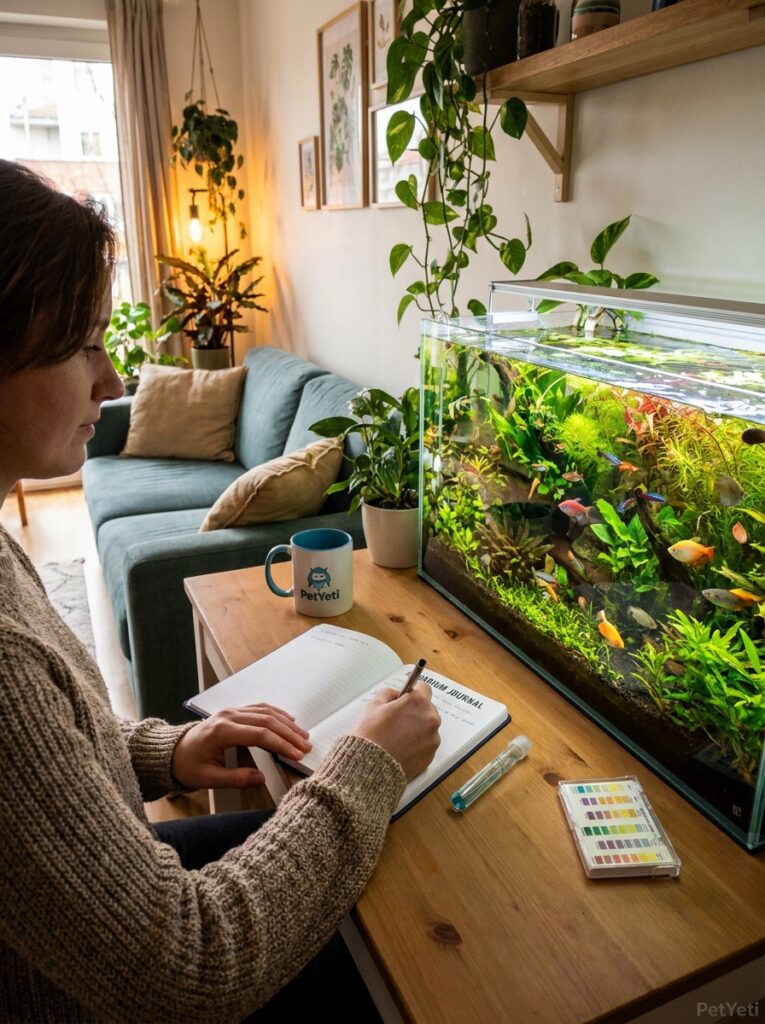
Step 1: Collect a Water Sample
Begin by collecting aquarium water in the test tube provided with your kit.
Avoid:
- Dirty containers
- Soap residue
- Contaminated equipment
Always follow the instructions included with your specific test kit.
Consistency helps improve accuracy.
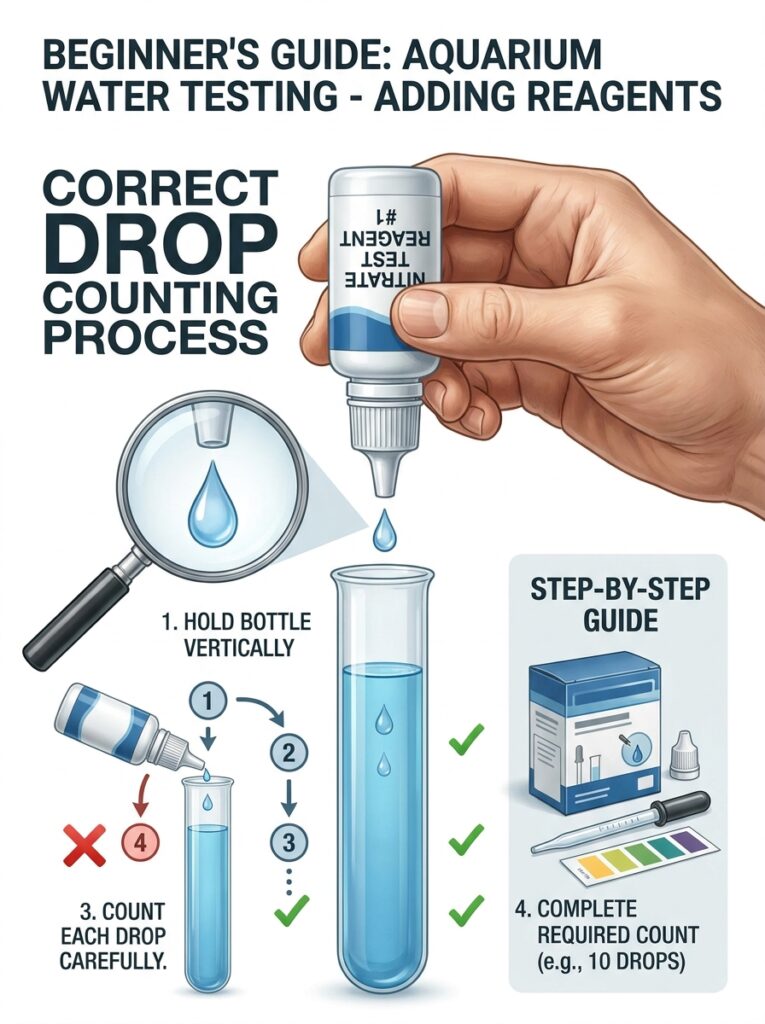
Step 2: Add the Test Reagents
Most liquid test kits require adding a specific number of drops.
Follow the instructions carefully.
Common beginner mistakes include:
- Adding too many drops
- Mixing bottle caps
- Skipping shaking instructions
- Using expired reagents
Small mistakes can affect results.
Step 3: Wait the Recommended Time
Different tests require different waiting periods.
Many beginners rush this step.
The color may continue developing for several minutes.
Always wait the full recommended time before comparing results.
Patience improves accuracy.
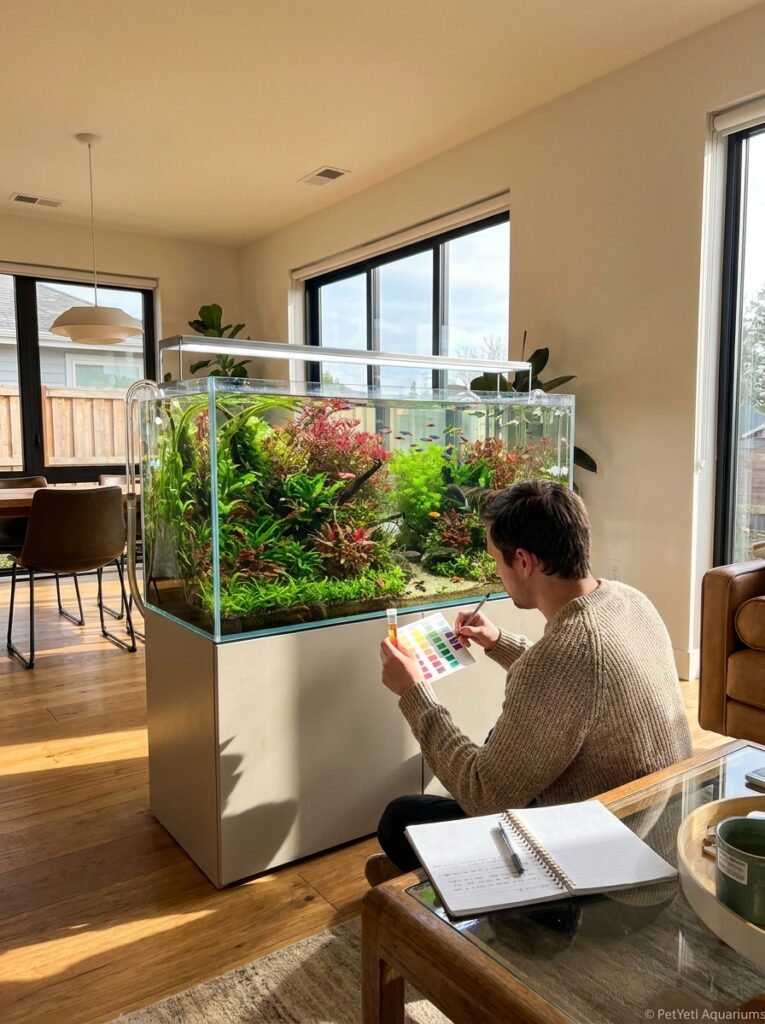
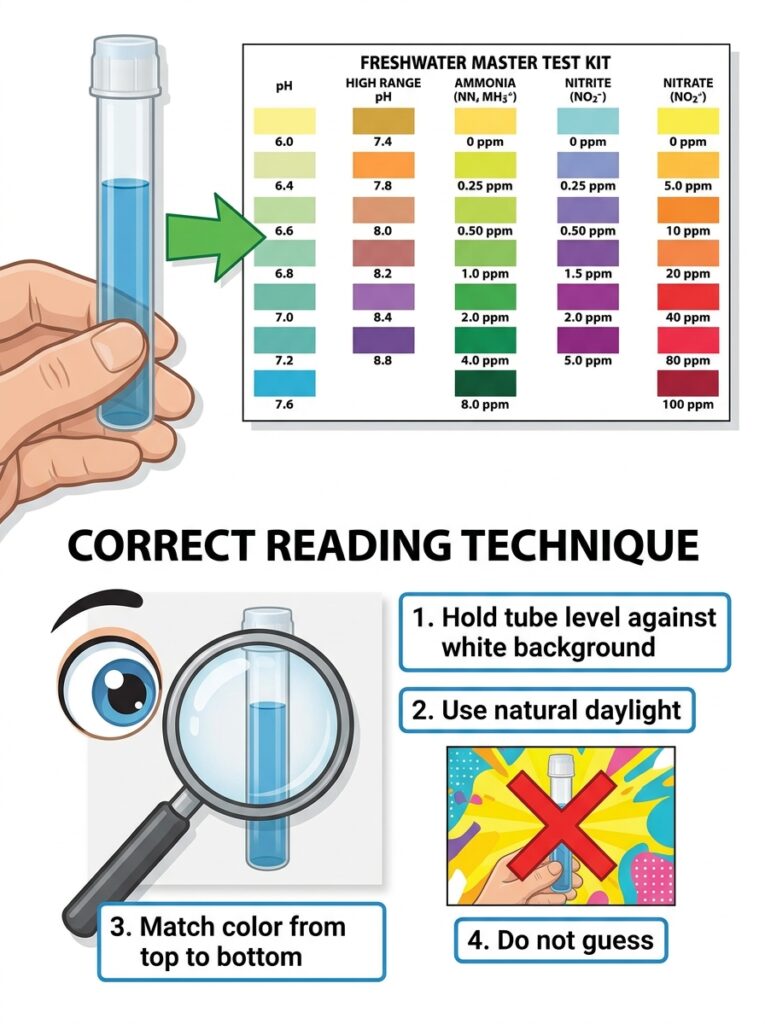
Step 4: Compare Results to the Color Chart
This is where the numbers begin to tell a story.
Hold the test tube beside the provided color chart.
Try to:
- Use natural lighting
- Avoid colored room lighting
- Compare carefully
- Take your time
The goal isn’t perfection.
The goal is identifying meaningful trends.
How to Interpret Your Results
Many beginners focus only on the number.
Experienced hobbyists focus on the pattern.
For example:
Good Signs
- Stable pH
- Zero ammonia
- Zero nitrite
- Manageable nitrate levels
Warning Signs
- Detectable ammonia
- Detectable nitrite
- Rapid changes
- Unusual spikes
Testing becomes much more useful when results are recorded over time.
Common Water Testing Mistakes
Testing Only When Something Goes Wrong
Routine testing is more valuable than emergency testing.
Ignoring Trends
One result is useful.
Multiple results over time are even more valuable.
Chasing Perfect Numbers
Stability usually matters more than perfection.
Not Recording Results
Keeping simple notes can reveal patterns that are otherwise easy to miss.
How Often Should You Test Aquarium Water?
New Aquariums
Several times per week during cycling.
Established Aquariums
Weekly or biweekly testing is often sufficient.
Problem Situations
Test more frequently whenever fish behavior changes unexpectedly.
CONCLUSION
Water testing doesn’t need to feel intimidating.
Once you understand the basic process, it becomes one of the most valuable skills in fishkeeping.
Testing regularly helps you understand your aquarium, identify problems early, and create a healthier environment for your fish.
Over time, you’ll begin to recognize patterns and gain confidence in your maintenance routine.
The goal isn’t becoming a water chemistry expert.
The goal is understanding enough to keep your aquarium stable and your fish healthy.
FAQ
How often should I test aquarium water?
New tanks often require more frequent testing, while established aquariums may only need weekly or biweekly checks.
What is the most important aquarium water test?
Ammonia is one of the most important parameters, especially during cycling.
Can clear water still be unhealthy?
Yes. Water can appear clear while harmful chemical imbalances exist.
Should I write down my test results?
Yes. Tracking results over time helps identify trends and potential problems.
Do I need to test water after every water change?
Not always, but periodic testing can help confirm that water quality remains stable.
Pingback: Best Aquarium Gravel Vacuums for Beginners
Pingback: Why Is My Aquarium Water Foamy? Common Causes & Easy Fixes